Subscribe to the latest

    • Home
    • Recipes
      • Cheap & Easy Recipes
      • Slow Cooker
      • Instant Pot
      • Healthy
    • DIY & Crafts
      • Home Decor
      • Organization
      • Crafts
      • Gardening
    • Frugal Living
    • Holidays
      • 4th of July
      • Fall
      • Halloween
      • Thanksgiving
      • Christmas
    • About
    ↑

    Prudent Penny Pincher

    Save Money on DIY, Recipes, Crafts, Home Decor and More

    • Home
    • Recipes
      • Cheap & Easy Recipes
      • Slow Cooker
      • Instant Pot
      • Healthy
    • DIY & Crafts
      • Home Decor
      • Organization
      • Crafts
      • Gardening
    • Frugal Living
    • Holidays
      • 4th of July
      • Fall
      • Halloween
      • Thanksgiving
      • Christmas
    • About

    Home » DIY » DIY Dollar Store Christmas Lantern

    DIY Dollar Store Christmas Lantern

    November 1, 2020 by prudentpennypincher.com 4 Comments

    This post may contain affiliate links. I may receive commissions for purchases made through links in this post.
    7.1Kshares

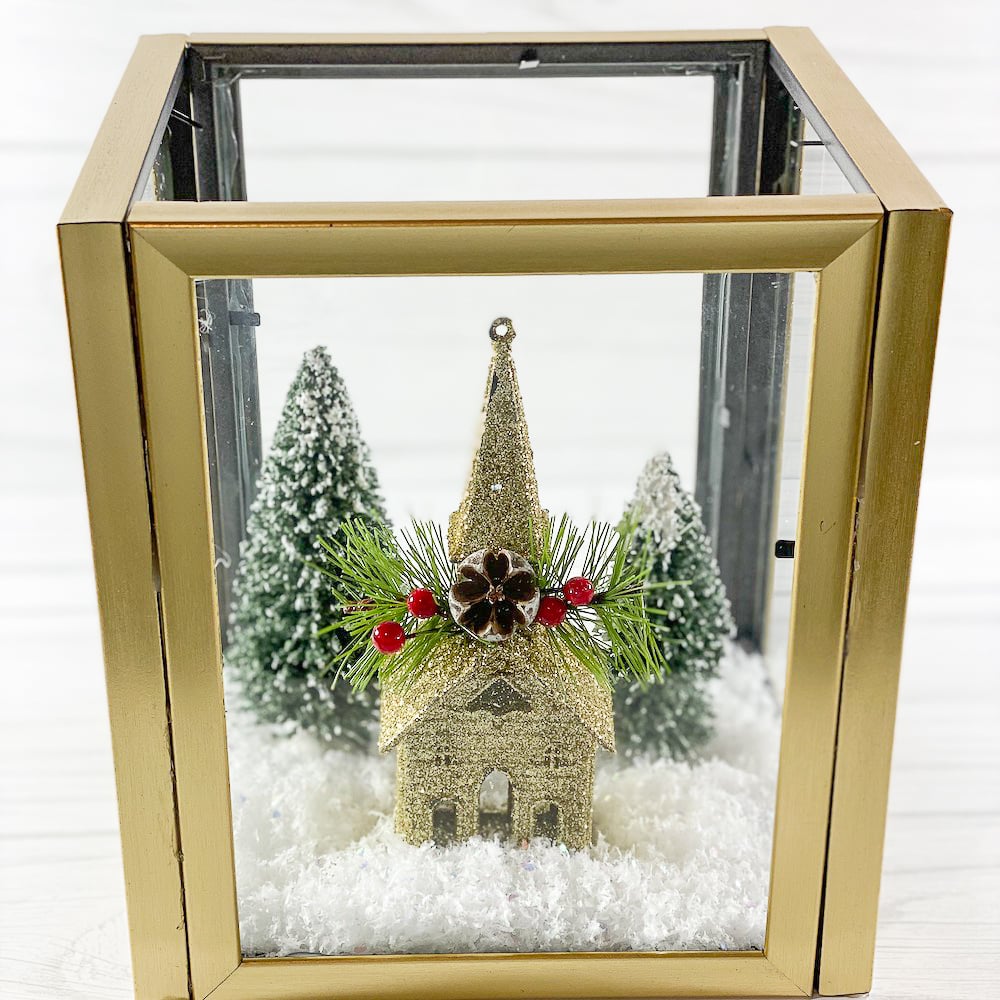
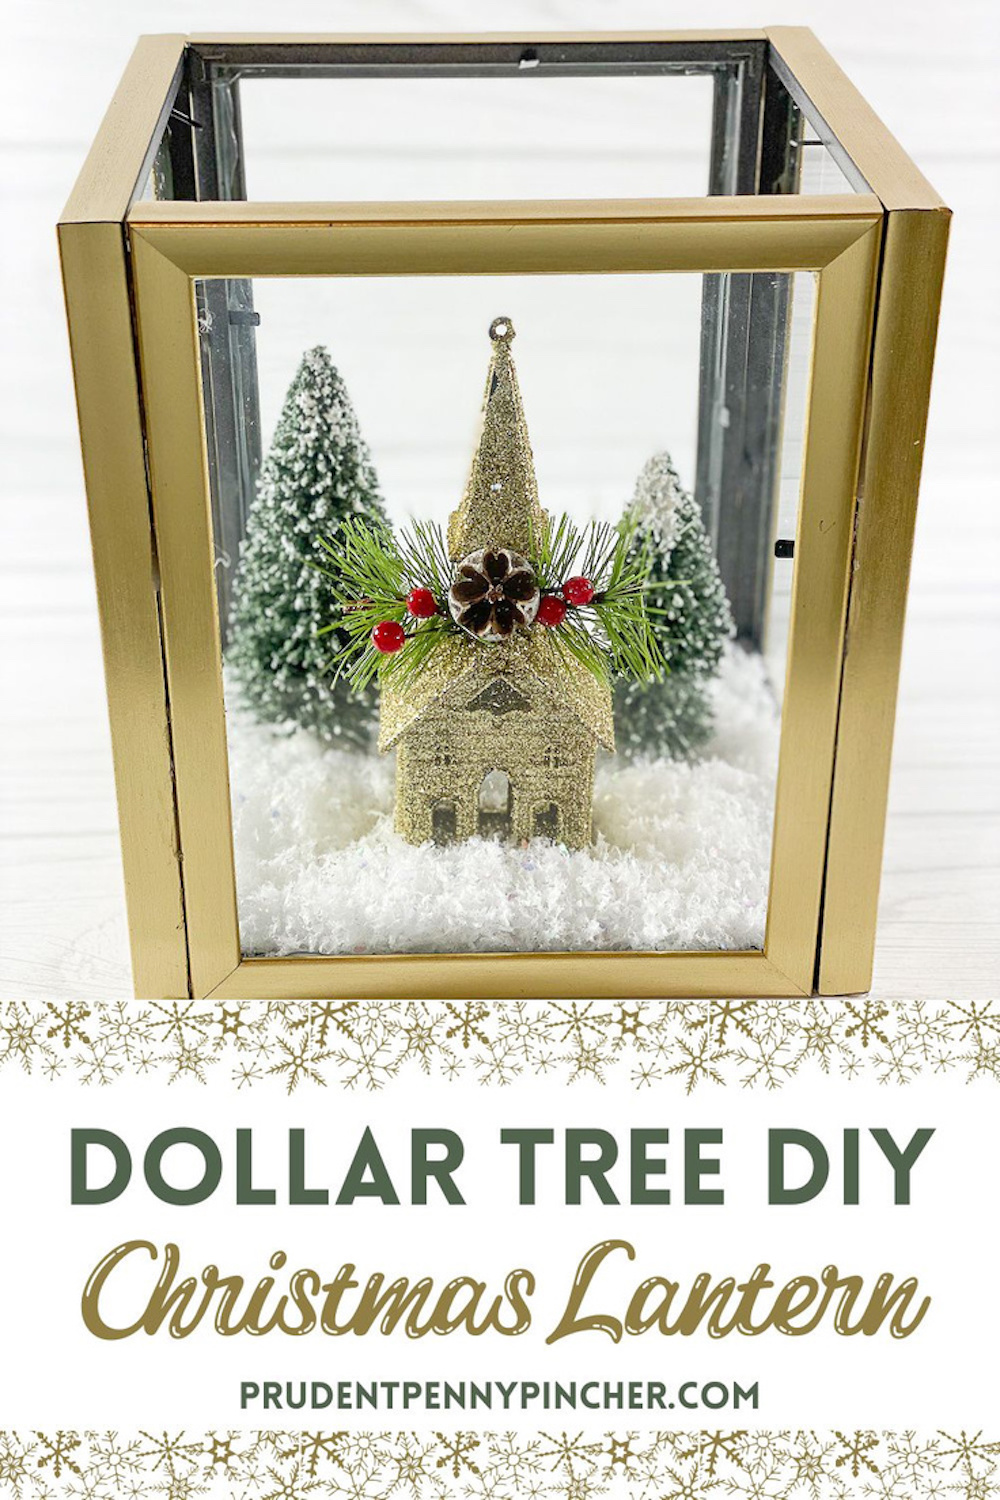
    Make this DIY Dollar Store Christmas Lantern without breaking the bank. For less than ten dollars and fifteen minutes of your time, you can create this cheap and easy Christmas decoration that is perfect as a Christmas centerpiece or a Christmas craft project.

    Supplies for DIY Dollar Store Christmas Lantern:

    • hot glue gun and glue sticks
    • epsom salt or faux snow
    • 4 picture frames
    • white foam board
    • pencil
    • craft knife or scissors
    • Christmas village figurines and/or Christmas ornaments

    Total Cost: $8

    Time: 15 minutes

    Difficulty Level: Easy

    Instructions for DIY Dollar Store Christmas Lantern:

    1. Remove the plastic, frame back and picture inserts from the picture frames.
    2. If you don’t want the little tabs to show, you can pull them back and glue the glass to the frame or if it doesn’t bother you, then you can just put the tabs back down to hold the glass in place.
    3. Glue the corners of the picture frames together. Hold together firmly until each frame dries (about a minute). Be generous with the glue because you want it to hold up well.
    4. Using a pencil, trace the outline of the box onto the foam board.
    5. Cut out the outline, erase pencil markings and glue the foam board to the bottom of the box.
    6. Pour your snow in the box and arrange your village pieces where you want them. You can glue the figurines in place if you would like to.
    7. You can also add some lighting to your lantern to create a magical effect (tea light candles, fairy lights, battery operated LED lights, etc.)

    There is a lot of room for creativity on this project. You can paint the frame any color you want and put anything you want inside! It can be used as a Christmas centerpiece, an accent piece or even a Christmas gift!


    Related Posts:

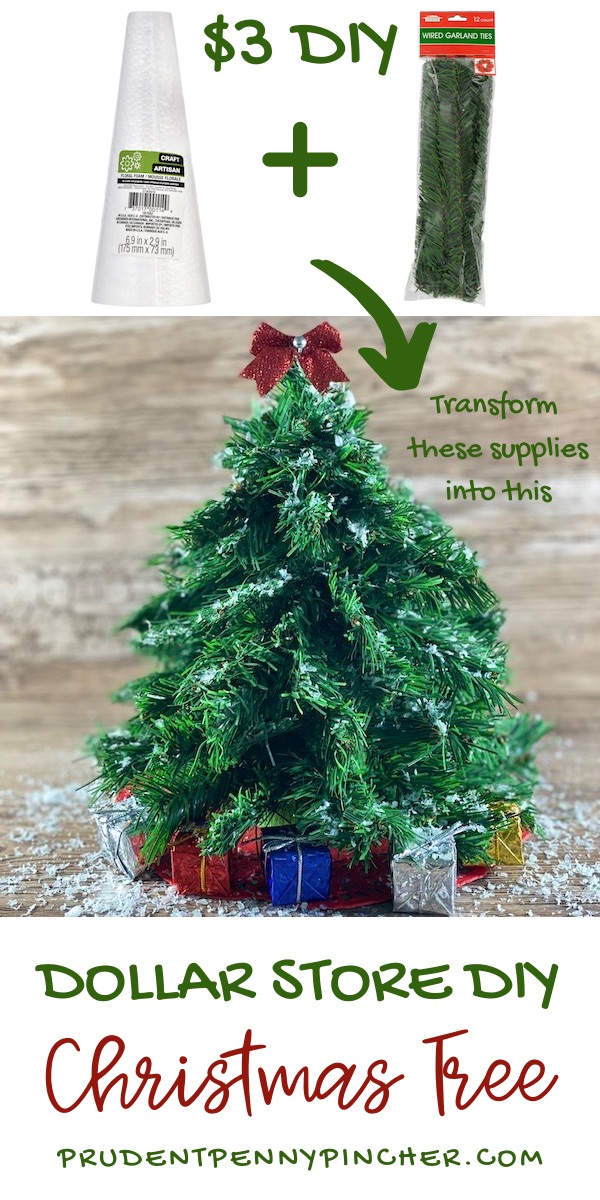
    Dollar Store DIY Christmas Tree
    Dollar Store DIY Christmas Tree


    7.1Kshares

    Filed Under: Christmas, DIY Tagged With: christmas, christmas decor, christmas decorations, christmas diy, diy

    Comments

    1. Sandy says

      December 25, 2017 at 4:42 pm

      Love the frame Christmas scenes. What do you use for the top?

      Reply
      • prudentpennypincher.com says

        December 26, 2017 at 9:39 am

        Glad you like it! I don’t use anything for the top so that I can change out the scene inside, but you could use another picture frame as the top like in this DIY: http://hip2save.com/2017/10/20/diy-dollar-tree-picture-frame-lanterns/

        Reply
    2. Lizzy says

      November 28, 2018 at 5:23 pm

      Such a lovely idea how did u do the base. Thank you lizzy

      Reply
      • prudentpennypincher.com says

        November 29, 2018 at 8:20 am

        Hi Lizzy,

        I used a white foam board (https://www.dollartree.com/readi-board-white-foam-boards/809955) from Dollar Tree for the base. I just traced an outline of the lantern base onto the board with a pencil and cut it out and used hot glue to secure it to the bottom of the lantern.

        Reply

    Leave a Reply Cancel reply

    Your email address will not be published. Required fields are marked *

    Recipe Rating


    This site uses Akismet to reduce spam. Learn how your comment data is processed.

    Hi, I'm Stephy!

    I am the CEO of Prudent Penny Pincher. I have been an author, content developer and professional blogger for 5 years. Prudent Penny Pincher explores ways to save money on everyday life with a particular focus on recipes, DIY, and crafts while sharing helpful frugal tips along the way. Read More

    Pinterest

    What’s Trending

    100 Best Meal Prep Recipes

    100 Best Meal Prep Recipes

    100 Healthy Instant Pot Recipes

    100 Healthy Instant Pot Recipes

    150 Best Air Fryer Recipes

    50 DIY Dollar Store Farmhouse Decorations

    50 Dollar Store DIY Farmhouse Decor Ideas

    Subscribe to the latest

      Copyright ©2020, Prudent Penny Pincher. All Rights Reserved. Design by Pixel Me Designs
      AboutPrivacy PolicyContact